hello, today i want to show you my fimo/polymer clay creations so far. It's a lot so I'll do it in 4 parts. First I'll do the chibis I made.
This is my first Spencer Reid charm.
This is just a random girl with a rose.
This is a Japanese girl with a marbled kimono and a marbled rose.
This is another Japanese girl, She has a glow-in-the-dark kimono.
This is my first chibi ever. It's Katniss from the Hunger Games.
This is a mermaid, only a part of her tail broke off.
This is a girl in a panda suit. I love the idea, but it didn't turn out really well.
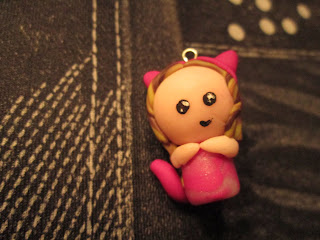
This is a girl in a cat costume.
This is a little witch girl, but her eyes didn't turn out well.
This is a little fairy.
This is another cat girl.
This is my second Spencer Reid charm. I love him so much. He even has a little tie!
This is another random girl. I know, her eyes have failed.
This is a girl with golden hair.
This is my biker chibi. It's probably the biggest chibi I've ever made.
This is one of the first chibis i made. It's another random girl.
This is the last chibi. It's a girl listening to music.
Hope you like them.
bye xxx
Wednesday, 30 January 2013
Sunday, 27 January 2013
how to draw: chu chu frog
hello, this tutorial is about how to draw chu chu frog. I think it's a very very cute character, and it's not difficult to draw.
Step 1: make the shape of the head
step 2: make two rounds above the head. This is where the eyes are coming.
step 3: with a stuffer, you stuf the lines between the head and the rounds.
step 4: then you make the eyes.
step 5: you make a "U" shape for the mouth.
step 6: then you draw the body.
step 7: next step is to draw the arms.
step 8: you're almost ready. now, you draw the lines with a black marker.
step 9: and now you give it a color with your green marker.
you can also make variations.
Hope you like it~! bye xxx
Friday, 25 January 2013
lucky paper stars (part 3)
hello, immediatly after my last post, I decided to make the tutorial that I promised. It's even easier then making stars.
you need: paper, a triangle, a pencil and a fountain pen.
step 1:
With your triangle, you make a line on the paper with the latitide of 1/2 cm.
step 2:
You make a few other lines
step 3:
You write or draw something in the stripe.
step 4:
You repeat your writing or drawing till the half of the stripe.
step 5:
You cut the stripe out.
THEN: You're ready to make your lucky stars!!!
hope you enjoy making your own stars. bye xxx
lucky paper stars (part 2)
hello, today i want to tell you where to buy the strips for lucky stars. I buy most of my strips at hobby markets, but I also make them myself. But soon, i want to buy them online. Some nice sites are:
http://www.janetstore.url.tw/
http://www.etsy.com/shop/origamipalace
http://www.etsy.com/shop/Yeestore
I live in Holland, so here are also some dutch sites (some also ship international):
http://jorigami.nl/shop/index.php?cPath=29_138
http://www.mostcutest.nl/c-1611382/lucky-stars-papier/
http://www.cuteness.nl/c-1614299/lucky-stars-papier/
In one of my next posts, I will post a tutorial on how to make lucky star strips.
bye xxx
Thursday, 24 January 2013
lucky paper stars
hello, today i want to do a tutorial on how to make lucky (paper) stars.
It's easy to do and very fun. You can give them to friends and family as a gift or put them in little bottles as decoration. You even can make jewellery of them. I made step-by-step photos to show you how it's made.
step 1: you take your lucky star paper strip.
step 2: you make a loop.
step 3: you take the end of the strip and pull it through the loop.
step 4: you pull it, till you get a pentagon shape.
step 5: you fold the edge to the inside.
step 6: you fold the long part of the strip over the edge.
step 7: you repeat step 6 as long as you can.
step 8: you put the end in the paper pentagon.
step 9: then you heve a beautiful pentagon.
step 10: now, you do this:
AND TADAAA!!! You're done
now you're ready to make your own collection of lucky stars. Hope it works out!
bye xxx
Subscribe to:
Posts (Atom)